Here is a link to the first of two podcasts on how to learn mathematics (well actually anything). This first episode was recorded while I was working at AMSI with a colleague, Helen Booth, a few years ago and has just been released. The second episode will be recorded soon and will build on the ideas discussed here.
Here is a summary of some of the ideas and resources mentioned:
Routine – create a routine. Learn at the same time of day, in the same place. Find a place where you feel comfortable and make it your own. Have everything you need for learning at hand. It could be in your home, a library or somewhere in school.
Break learning into small chunks – little and often is better (more sticky) than trying to cram a whole topic in a short time.
Mix topics and subjects – sometimes moving on to something else ca help whe you are feeling stuck or overwhelmed by a topic.
Start learning early – spreading learning over time is more effective, in terms of long term memory than cramming.
Be active – reading and highlighting is not revising! Make notes, rephrase notes, use flashcards, do problems/past papers.
Study with others – studying with others is a great way to learn. Whether you work as a group or just work side-by-side. Having others around you creates an atmosphere for learning and improves concentration.
Pomodoro technique
The pomodoro technique is a great way to focus learning/studying. The basic steps are listed below.
The pomodoro technique:
Decide on a small goal (do two problems, make notes on one topic)
Remove all distractions (phone, TV, other people)
Set a timer for 20 – 25 minutes
During that time concentrate on your goal
At the end of the time give yourself a reward (drink, food, walk, phone or TV time)
Repeat the process 2 or 3 more times.
Resources
Learning how to learn – A link to Barbra Oakley’s website and to resources from the book Learning how to learn.
To be explicit or to inquire that is the question!
Here is my take on the latest maths wars. What do I mean? With the revised Australian Curriculum in the news, the war between the proponents of explicit teaching and inquiry learning has been hotting up.
Personally, I do not see this as a dichotomy. Today there was an article in The Age written by Adam Carey. It outlines the two schools of thought and closes with a teacher describing how they ignited students’ interest through inquiry and plugged gaps in knowledge using explicit teaching. This approach seems sensible to me. Below is my response to the article on The Age website.
In a classroom, many different types of pedagogy are used every day. A good teacher will tailor the learning to the students in front of them. They are teaching the same material in different ways. Some explicit teaching is always necessary, and some inquiry/investigation is also needed. For example, being flexible andthinking about numbers and number manipulation in different ways is essential to use numbers in everyday situations and at higher levels. But, in order to approach a new problem, you need to have the inquiry/investigation skills to transfer knowledge and think creatively. There are techniques that I feel are not used often enough in the classroom. These include: using physical objects (manipulatives), encouraging students to visualise and draw diagrams, and to estimate before they calculate.
A curriculum should not be dictating a pedagogy. It should outline content to be learnt but not how it should be taught.
We need to trust and respect our teachers to decide the best way to teach their students.
I have not written a blog for a long time, I apologise. Here is a short post about one of my favourite podcasts.
One of my favourite podcasters is Christina Tondevold of Build Maths Minds.
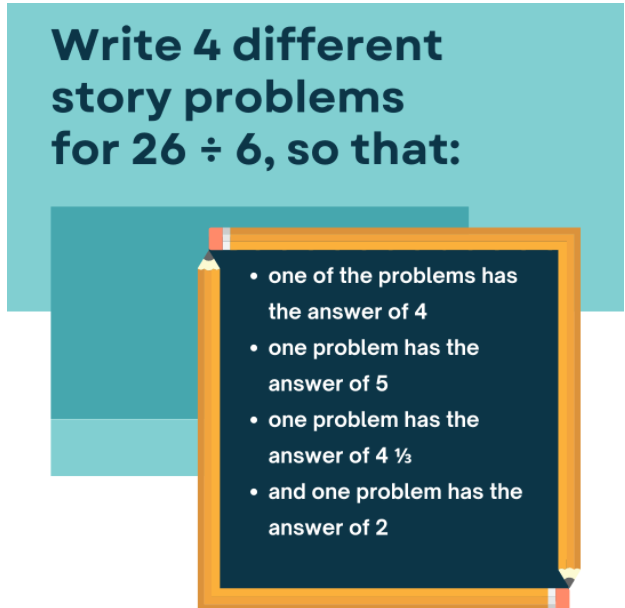
In her most recent post (12th December 2021) Christina talks about a particular style of problem
The students are asked to write four stories for a given problem. Each story is framed so that there is a different solution.
It took me a while to work out what was going on but as the podcast progressed and possible stories were given, I realised just how clever this problem style is. I began to think about how such problems could be presented to students and how manipulatives could be used.
Students are often reluctant to write in maths in class. Asking them to write stories, making maths more about communication and less about numbers, is a great way to encourage writing. These problems also make students think deeply about the meaning of an answer. Writing these stories will engage and challenge even the ablest students and reveal misconceptions.
Thinking about how I would introduce this to a class I might start with a number talk, asking the students to tell a story, and then ask the students to write them down. The stories, with accompanying illustrations and calculations, would make a great wall display.
The podcast was only part one and I am looking forward to part two to see where this will go.
In this, the last post of the Algebra Tiles series, I will be looking at how you can use the tiles to demonstrate various more advanced ideas, such as difference of two squares and completing the square.
In this, the last post of the Algebra Tiles series, I will be looking at how you can use the tiles to demonstrate various more advanced ideas, such as the difference of two squares and completing the square.
Dividing a quadratic expression by a linear factor
Dividing a quadratic expression by a given linear factor is similar to factorising. Doing this is the same as for factorising, you are building a rectangle, but one of the side lengths is now fixed.
Here are three examples of such divisions in increasing complexity:
Dividing a quadratic expression by a linear factor – example 1Dividing a quadratic expression by a linear factor – example 2Dividing a quadratic expression by a linear factor – using zero-sum pairs
Perfect Squares
What is a perfect square? The result of multiplying two identical linear expressions! So we are building squares, not rectangles.
Building a perfect square
You can use the visual representation to discuss the features of a perfect square and how to recognise one when written out in full:
(x + 3)2 = (x + 3)(x + 3) = x2 + 6x + 9
Difference of Two Squares
By showing students a visual representation and using the tiles to demonstrate the addition of zero-sum pairs, students should be able to see the pattern formed when factorising the difference of two squares.
Factorising the difference of two squares
Completing the Square
What do we mean when we talk about ‘completing the square’?
By attempting to build a square, with the given expression, and showing that we may need to add or remove terms to achieve the square, we can make meaning of the term ‘completing the square’. In the second video, I show how you may need to add in zero-sum pairs to complete the square.
Completing the square – a simple exampleCompleting the square – with the use of zero-sum pairs
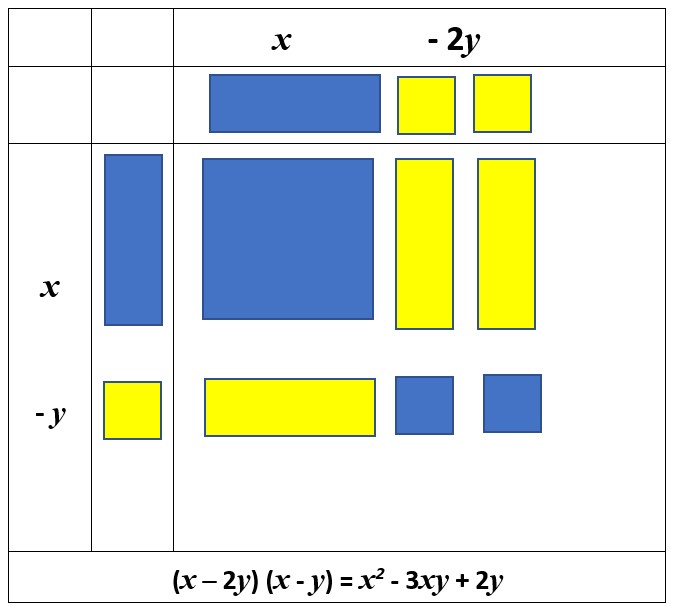
Extending to Two – Variables
I did mention when talking about collecting like-terms, in Part 2 of this series, that you can model expressions that contain two-variables. In this video I show how to do that:
Extending the model to two variables
Resources
There is a Padlet to accompany this blog series with links to research, virtual manipulatives and other resources.
In Part 2 of this series, I will demonstrate how Algebra Tiles can be used to build expressions, model addition and subtraction of expressions, and model substitution into algebraic expressions.
In the previous blog post, I looked at how to make Algebra Tiles and use them to model integer operations.
Building an algebraic expression
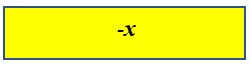
If you have used Algebra Tiles to model integer operations you can now introduce the x-tile and the x2-tile.
In the video below I show how to build an expression. It is important that the students recognise the different shapes and colours and what they mean. I would take some time on this stage as you want them to be very familiar and comfortable using the tiles.
Using Algebra Tiles to build an expression
Collecting Like-Terms
Once students can build a simple expression you can move on to more complex expressions and looking how they can be simplified by collecting together like-terms. Students often find it difficult to recognise what is meant by a like-term. By using the tiles it is easy to see which terms are similar by their size and shape. I would start with positive values only and then when students are confident with those introduce negative values, which are the same size and shape but a different colour.
Collecting like-terms
Multi-variable expressions
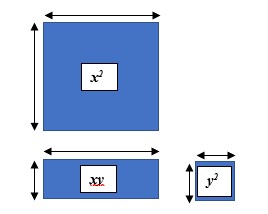
You can use Algebra Tiles to model expressions that have more than one variable. Below are videos of two ways this can be done. The first is using different coloured tile-sets for each variable. This can get a little messy and I would suggest the students write a key for each variable showing which colour is positive and which negative. The beauty of this method is that the students can really identify what a ‘like-term’ is. They can collect the tiles of the same shape and related colours.
The second method uses only one set of tiles as follows:
How to use Algebra Tiles to illustrate multiple variables
Using the square tiles to represent different variables can help the students to appreciate that each variable represents a different value.
Using Algebra Tiles to represent a multi-variable expression
Addition and Subtraction of Expressions
Once students can collect like-terms together you can move on to addition and subtraction of expressions. Below I use the same expressions with each operation and show how the result is different.
Adding expressions
Addition of expressions
Subtracting expressions
Subtracting multivariable expressions
Using the second method of modelling a multivariable expressions I showed above, I will demonstrate how you can use Algebra Tiles to subtract two expressions.
(Spot the mistake!)
Subtraction of multivariable expressions
Substitution
I have found that students often struggle with substitution. They do not understand what it means. Using Algebra Tiles the students can physically exchange the variable tiles for the unit tiles. The x2-tile is replaced by a square with side length of the given value. This allows the students to build a clear visual representation of what they are doing when they substitute the variable with a given value.
Substitution
Other ideas and suggestions
You may find that students will move away from using the tiles quite quickly and start drawing diagrams or using algebraic notation. I would suggest that you encourage them to use the tiles for the first few examples of each new type of question/activity. Students should feel comfortable to use the tiles whenever they feel the need.
I would also allow students access to the tiles during tests as well. Tests and quizzes can cause students increased stress level. Just knowing that they have the manipulative available can reduce their anxiety.
In Part 3 of this series, I will explore solving simple linear equations.
There is a Padlet to accompany this blog series with links to research, virtual manipulatives and other resources.
In this blog, the first of a series, I will show you Algebra Tiles – how to make them and how to introduce them to your students.
This is the first part of a series of blogs on Algebra Tiles. In Part 1 of this blog series, I will be focussing on introducing Algebra Tiles to your students, making your own Algebra Tiles, and using Algebra Tiles to model the four operations with integers.
Although not part of this blog readers should be aware of the Concrete Representation Abstract Model (CRA). In this model, it is suggested that students move through a series of stages when learning a new concept. Students first experience a concept using concrete objects or manipulatives, they then draw diagrams or representations of the concepts and finally move towards the use of abstract symbols. I will be referencing this model throughout this blog series. For more information on this see the Padlet I have made to accompany this blog series.
What are Algebra Tiles?
In this video clip I introduce the three tiles and what they represent.
Why make your own Algebra Tiles?
There are many commercially available Algebra Tiles, but I like to make them with the students. This is for a number of reasons:
The students will then feel that they “own” their tiles.
The process of measuring and cutting can tell you a lot about your students’ skills (or lack thereof)
The students can pick their colours – this is especially important for students with visual impairments
Here is the template I used for making my tiles and here is the template for the baseboard that I use in the videos.
To make the tiles:
Stick two A4 sheets of foam together, this is easiest if one of the sheets has a sticky back.
Then rule the sheet according to the template or use the measurements below:
unit squares were 1.5cm x 1.5 cm
variable rectangles were 1.5cm x 7cm
variable squared squares were 7cm x 7cm
Cut the shapes using a craft knife as scissors will pull the foam.
Keep the tiles in a resealable bag
You might also want to give the students a laminated A3 sheet to work on, so they can annotate and write notes as they use the tiles.
Using the unit tile to model the four operations
In this video clip, I show how the unit tile can be used to model integer addition and the meaning of a zero-sum pair. This concept is key to using Algebra Tiles.
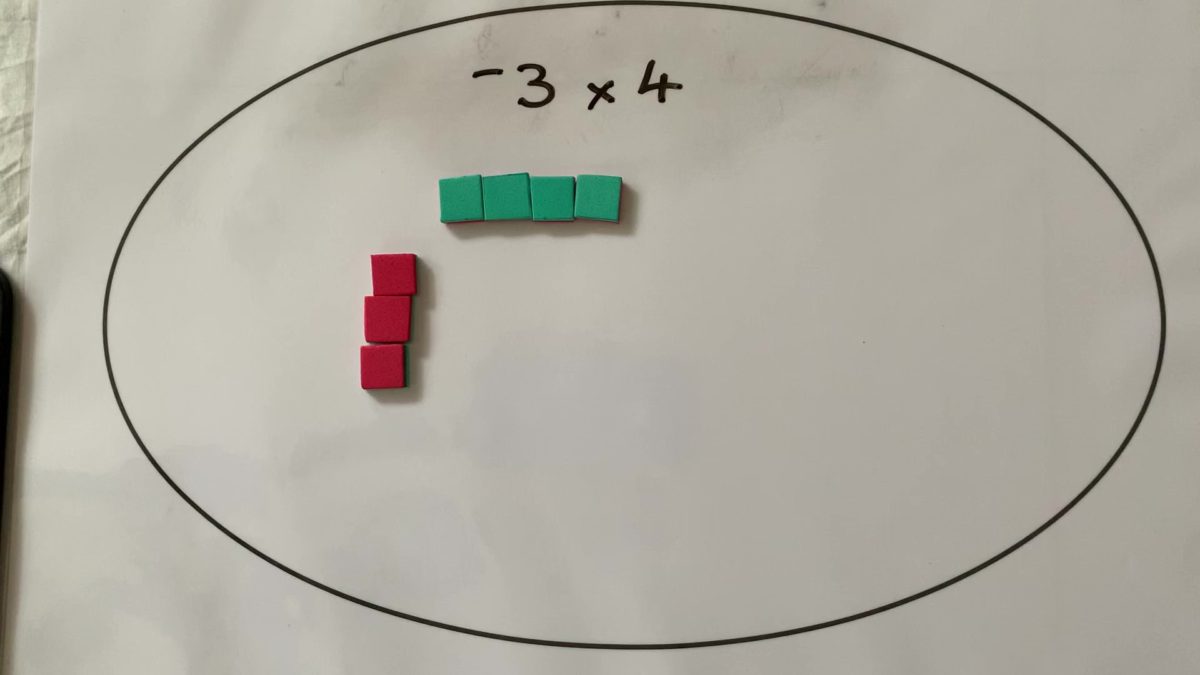
The following clips demonstrate how Algebra Tiles can be used to model the other operations, subtraction, multiplication and division and directed numbers.
Subtraction of directed integersAnother example of subtraction with directed integersUsing the array model for multiplicationUsing the array model and Algebra Tiles for multiplication of directed integersUsing the array model and Algebra Tiles to model division
Points to think about as you watch the video clips:
Using manipulatives in older year levels
It is rare to see manipulatives being used in a high school classroom. It is even rare to see them much beyond Year 3! The impression students have is that using manipulatives is infantile and only for those that are struggling. This is not the case and many (all?) students would benefit from using them, even if only for a short period.
I like to give the students time to familiarise themselves with the manipulative before I explain how we will be using them. I will ask the students to think about how they think the manipulative could be used, what mathematics it might be used with.
I might say to teachers that I “allow the students time to ‘play’ with the manipulative”, but I would be careful with the use of the term ‘play’ with students, as students should not view manipulatives as toys, as this would only reinforce the notion that they are not a serious tool for the exploration of mathematical concepts.
The language one uses
When using the tiles, be aware of the language you use. It is easy to use the same term for multiple concepts.
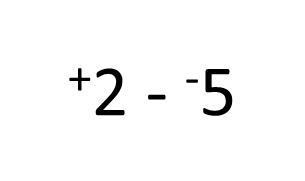
For instance, the word ‘minus’. Does this mean the operation subtraction or that the integer is a negative? How would you read the following?
Would you say, “plus 2, minus, minus 5”? This can be very confusing for students. By being careful to use the terms positive and negative to indicate the direction of the integer only, and not plus and minus or similar, can help to prevent this confusion. For this example, it would be better to say, “positive two, subtract, negative two”.
Giving the positive integer a direction is important. All integers have a direction. As mathematicians tend to be lazy, we drop the term positive as most numbers we deal with are positive. Students need to understand this point.
Give students plenty of time to use the manipulative
Give the students plenty of time to use the tiles. There will be students that ‘get’ the concepts very quickly and will feel that the tiles are not necessary. I would encourage the students to use the tiles a few times at least. Ask the students to record their thinking by taking photos or drawing pictures/diagrams of what they are doing (the R in the CRA model).
Remember the CRA model does not describe a linear process. Students should feel comfortable in picking up and using the manipulative anytime they feel that would be useful. The manipulatives should, therefore, be readily available and accessible.
Comments
Please use the comment section to let me know if you found this introduction to Algebra Tiles useful and, if you used them with your students, how that went.
In Part 2 of this series, I will show how Algebra Tiles can be used to build algebraic expressions, used to model the addition and subtraction of algebraic expressions, and used to model substitution into algebraic expressions.
This year I was lucky enough to present at a few mathematics conferences. At two of them, MAWA (Mathematical Association of Western Australia) and MAV (Mathematical Association of Victoria) I presented on the topic of ‘Using Manipulatives in the High School Classroom’. I had a great response to this topic with all the presentations well attended and really good discussions.
I realised that this was a topic that teachers were interested in and I began to think of ways to continue and grow the discussion. In a moment of madness, I started the FaceBook page Maths Manipulatives and was amazed at the response. I had 50 members in 10 minutes and a request to review a product. By the end of 48 hours, I had 1400 group members and the number has been slowly growing since then.
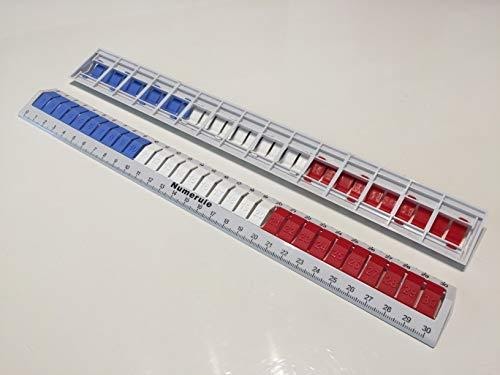
In this post, I will be reviewing the Numerule. I first saw this at the MAV conference and thought that it looked like a clever idea.
What is a Numerule?
The Numerule is a 30cm ruler that doubles as a simple counting tool for use in Lower Primary classrooms. Corresponding to each number on the ruler is a ‘button’ that can be pressed. Once pressed the button stays down, pushing up from underneath returns it to its original state. The buttons are grouped in tens by colour (blue, white and red).
The information that comes with the Numerule describes how it can be used for the four operations as well as for recording data. There are videos on the website showing children performing these tasks. The information also includes links to many Australian Curriculum descriptors. The website also has a teacher’s notes to download.
Trying it for the first time
As I received the Numerule, after school had finished I brought it to try out with my 6-year-old granddaughter. I gave it to her to look at without telling her what it was. She immediately started to push the buttons and saw that they could be pushed back into position. She used the ruler to measure a few things and told me that it could be used to draw straight lines. I asked her about the buttons she told me that they were in groups of ten and then counted in tens to 30.
I then told her that we could use it to do some maths questions. I asked her to show me how she could do 6 plus 5. She thought for a bit and then pushed down the 6 and counted on five, pushing the buttons as she went. The answer she told me was 11. I was impressed at how intuitive she found using it. We tried a couple more questions and she enjoyed doing them.
She then said look – and pushed down every other button and showed me that this was counting in two’s. Again this was without prompting.
I then guided her a little and we looked at subtraction problems. She then took the Numerule to bed!
My impression of the Numerule
Having now seen the Numerule in action I can see that it is a good design and looks to be strong enough to last in the classroom. My granddaughter took to it and quickly saw how to use it. I can see that in the classroom this could be a useful tool. As every student should have a ruler having one that doubles as a calculation aid makes sense.
If I have any criticism it would be that for the age group it is aimed at I would have grouped the colours in fives, not tens. This is how I make bead strings with students. I like the tactile nature of pressing the buttons and the way it can be used for data collection and representation.
Also, it is a little pricey at $14 (15% less if you buy over 25) but I was told that it is virtually unbreakable so should last. My younger grandchildren had a go with it and it did stand up to some quite rough treatment.