Algebra Tiles Part 3: How to Solve Linear Equations

Exploring solving linear equations using Algebra Tiles

In this post, I will look at how to use Algebra Tiles to solve Linear Equations. There are several ways you can draw diagrams to illustrate this process and also different concrete materials you can use. One of the most common will be using a balance to demonstrate that both sides of an equation must remain the same (in balance) as you manipulate the variables and constants. Using Algebra Tiles, and the zero-sum pair concept can help students understand why we ‘add/subtract the same from both sides’.

Numberless Word Problems

Students have to be comfortable with the notion that the variable an unknown amount. In order to help students I would start with Numberless Word problems (see this link and the Padlet for examples). This allows students to think about the problem before you introduce the numbers.

Here is an example:

Start with a very open scenario:

I have two baskets of apples. Each basket has the same number of apples.

Ask the students what they notice and wonder. There is no problem yet, maybe ask the students what they think the problem might be.

Then add a little more detail to the scenario:

In one of the baskets, the apples are loose. In the other basket, some of the apples are in bags.

What has this added to the problem? what questions might the students have now? What might the problem be?

I now add in some numbers to the scenario:

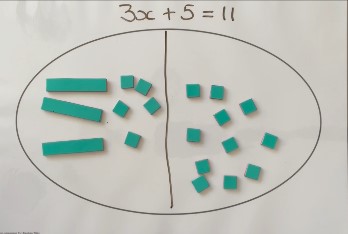
I have two baskets each with 11 apples. In one basket all the apples are loose. In the other basket, some apples are evenly divided into 3 bags and there are 5 loose apples.

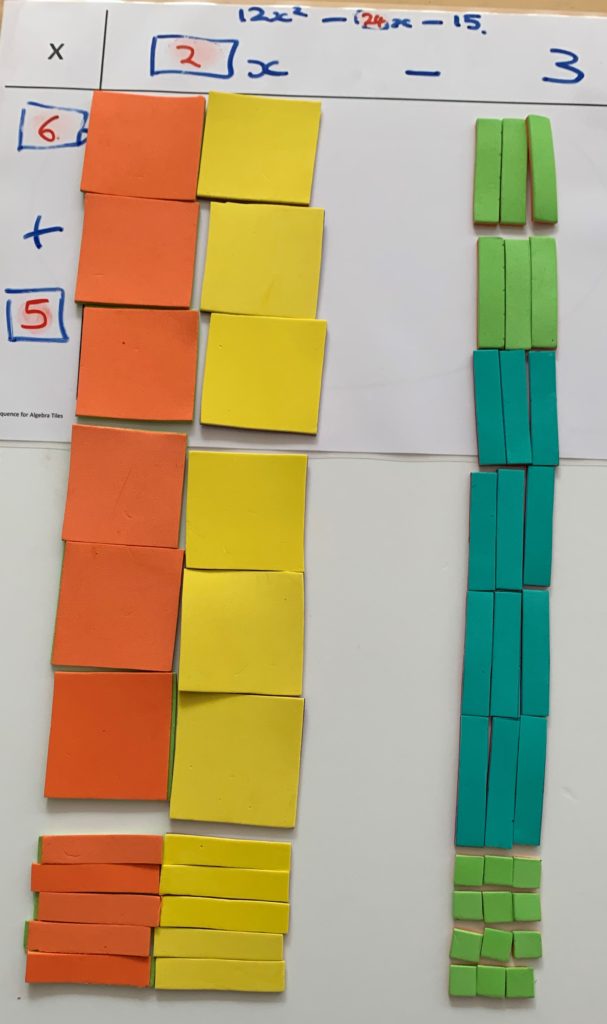
Now you can ask the students how they could write this problem down. Maybe ask them to illustrate it using Algebra Tiles. Here are some possible abstract representations:

3 bags of apples + 5 apples = 11 apples

3b + 5 = 11

There is still no question being asked – ask the students what they think the question is. In this case, the question would probably be:

How many apples are in each of the bags?

Once the problem is set up, you can begin to discuss how to solve the problem.

Solving simple linear equations

In the video below, I show how I would solve the above problem using Algebra Tiles. I have used conventional x rather than b.

Solving a simple linear equation using Algebra Tiles

I really like to annotate what I am doing as I work. Having a surface where students can easily erase errors will encourage them to ‘give it a go’, to try ideas that they are not confident with.

This also allows them to see where the standard algorithms come from. When they put in tiles to make zero-sum pairs and then annotate that the reasoning behind the algorithm for solving equations becomes more apparent.

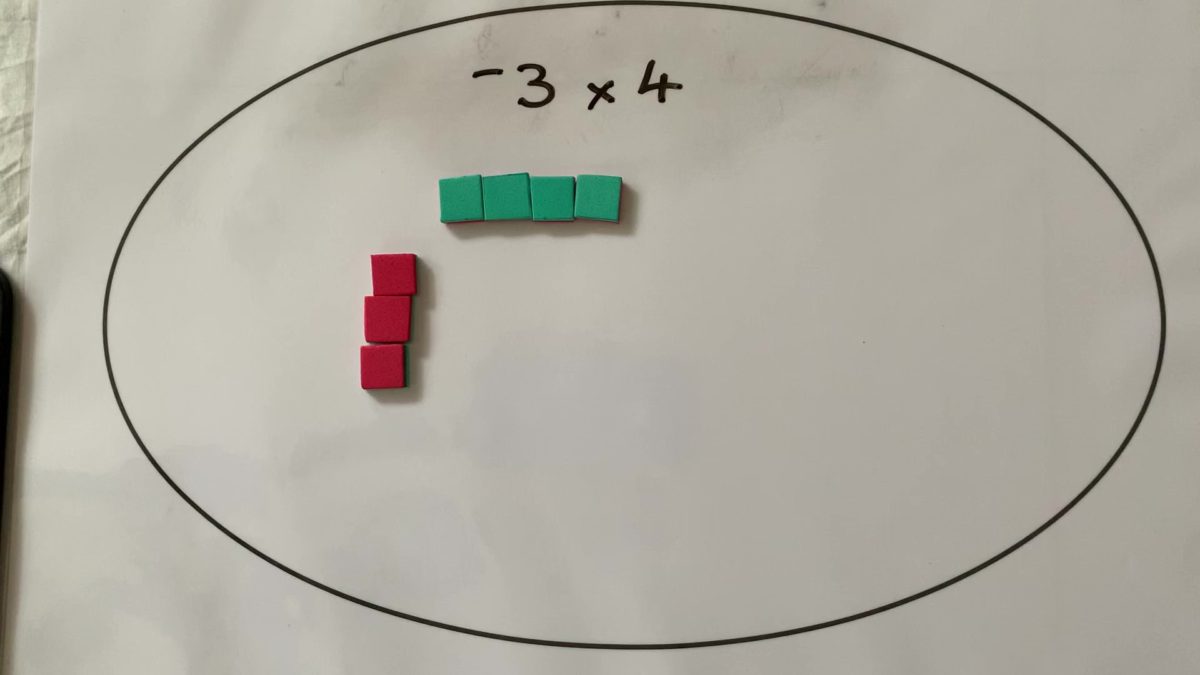
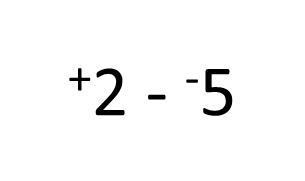
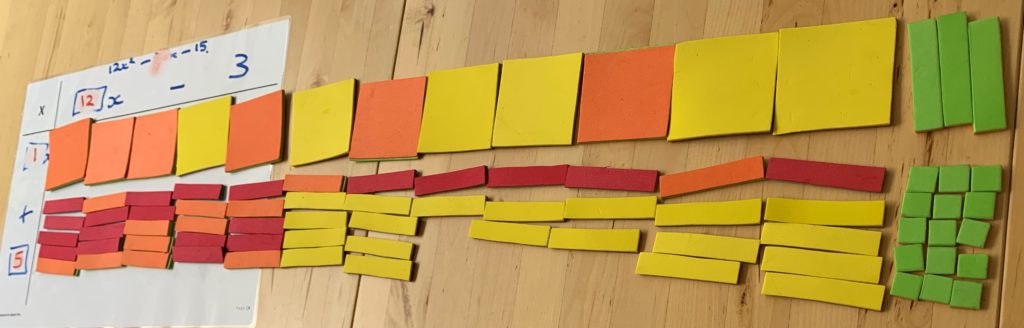
In this example, I have introduced negative values.

Solving a liner equation with negative values

Make sure you mix it up a little by not having the variables always on the same side of the equals sign!

Linear equations with variables on both sides of the equals sign

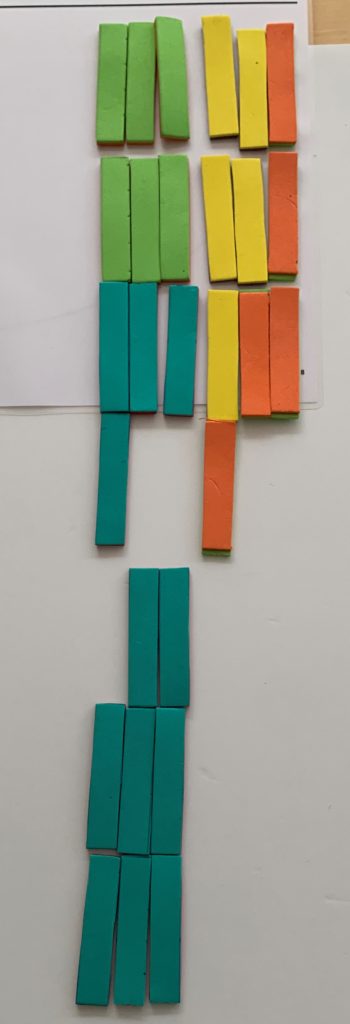
In the next few examples, I demonstrate how to use Algebra Tiles to solve linear equations with variables on both sides of the equals sign.

Solving a linear equation with the variable on both sides of the equals sign

Here is the same equation solved in a different way.

Same equation, different method

By encouraging students to solve in more than one way, they can begin to discover which methods are more efficient. Allow the students time to explain their methods to the class to discuss which method works ‘best’ and why. A gallery walk is a great way to do this.

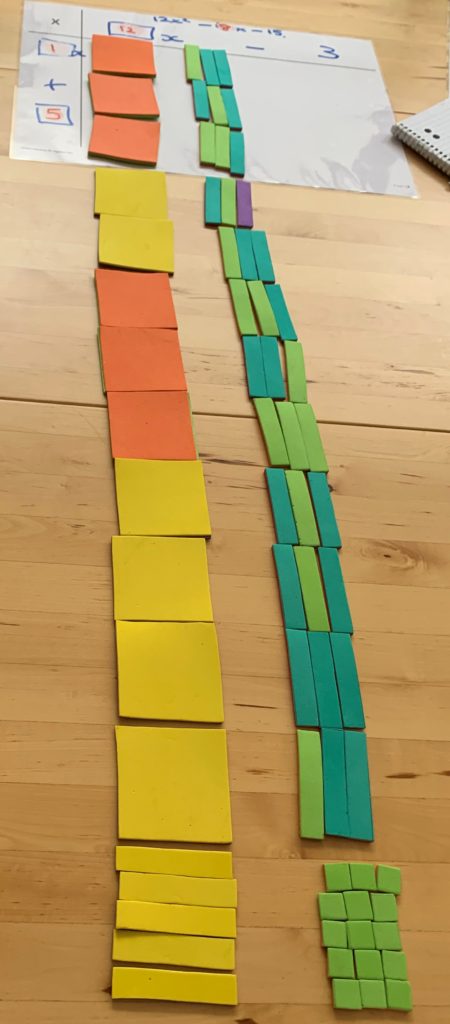
One more example of solving a linear equation.

Another example with the variable on both sides

In the above example, the variable has been written after the constant term. Although there are mathematical conventions for writing expressions, students need to work with examples written in unconventional ways. Often in tests, these sorts of questions are put into ‘throw’ the students.

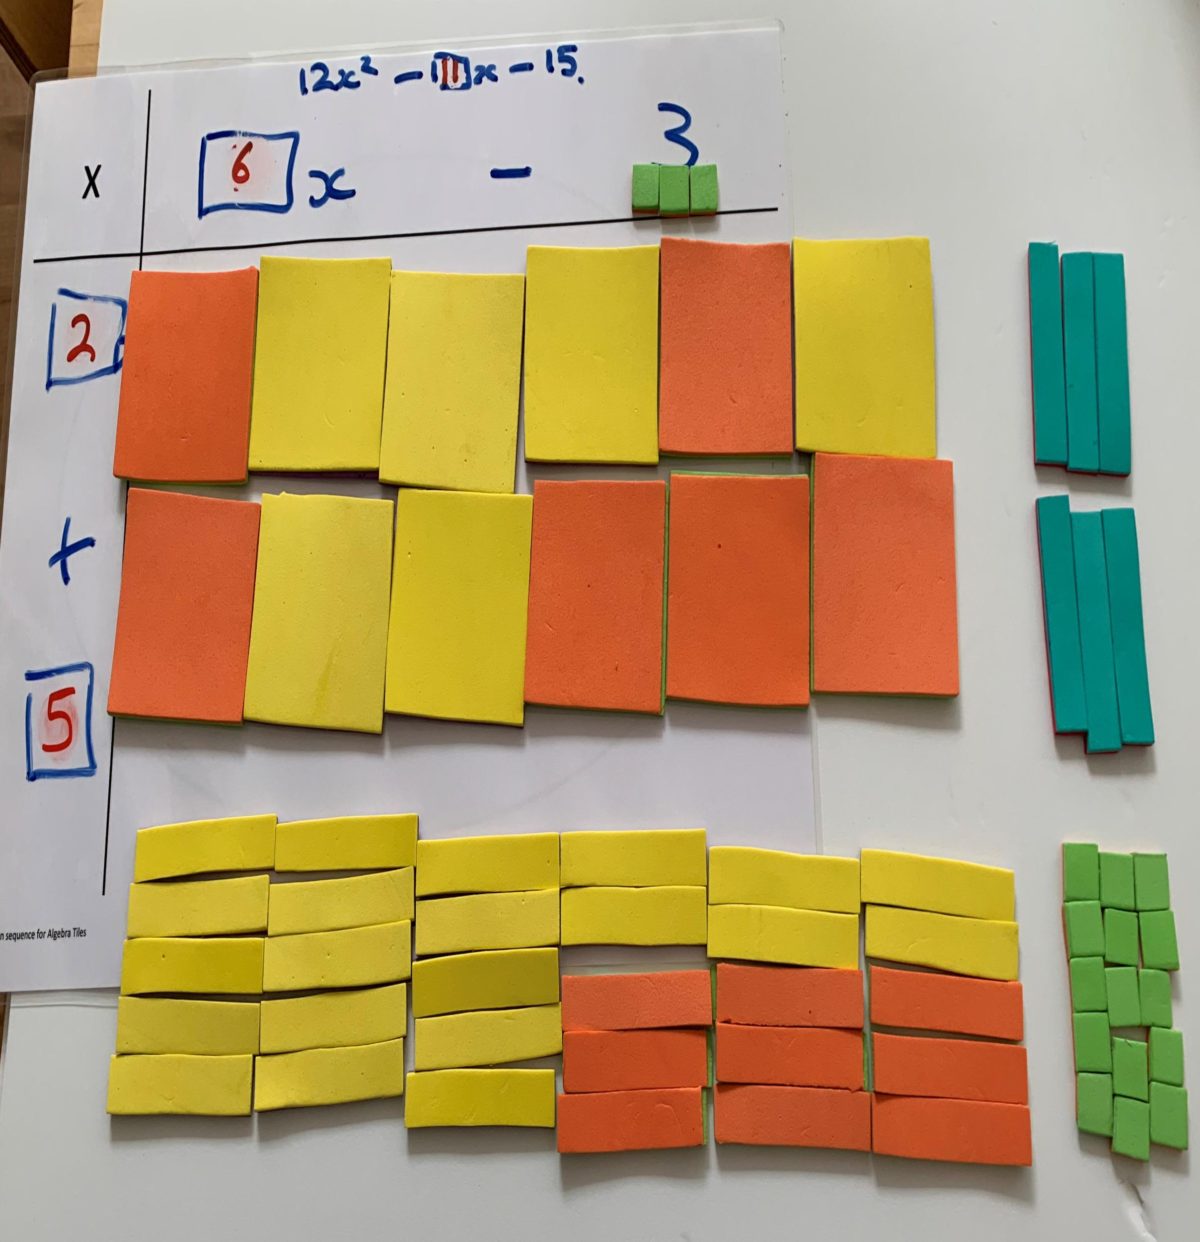
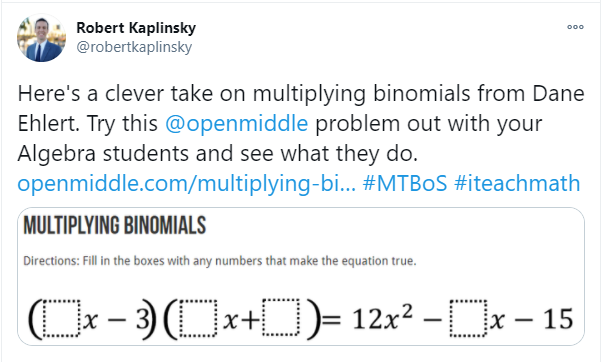
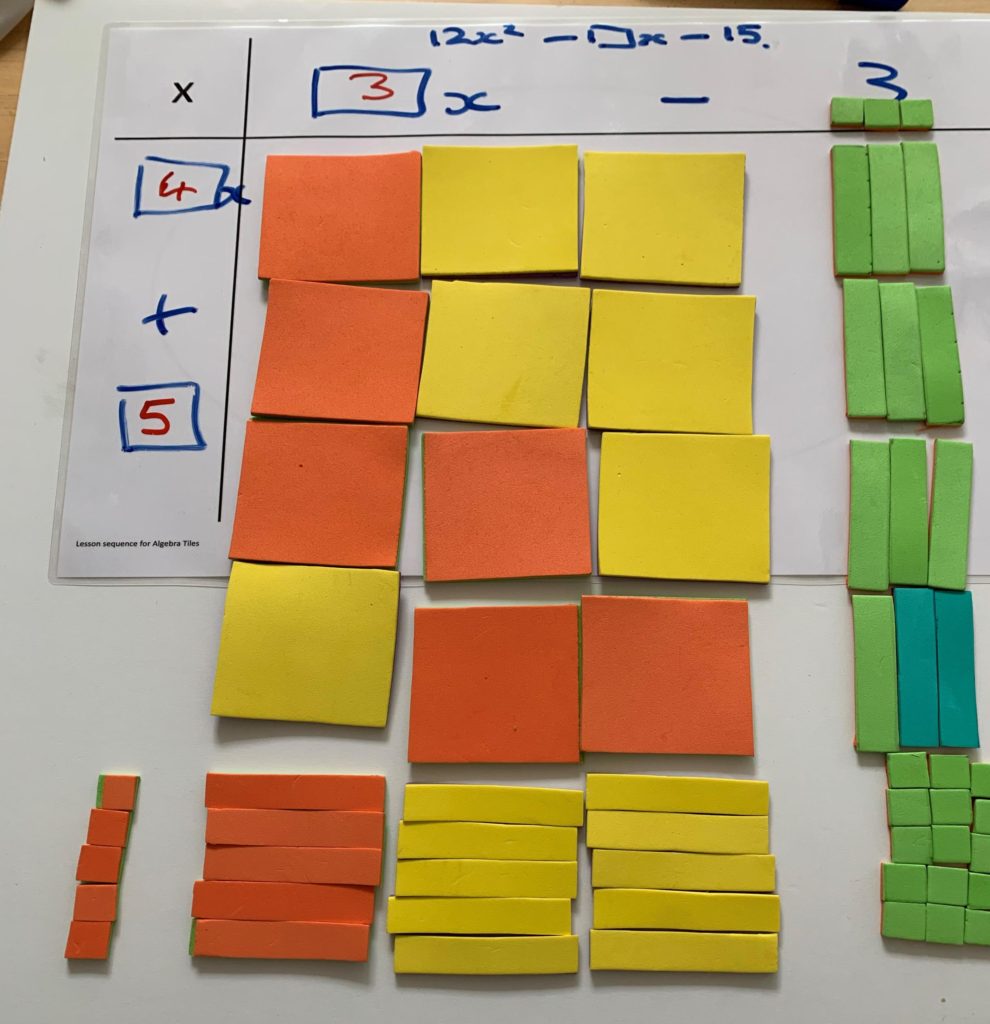
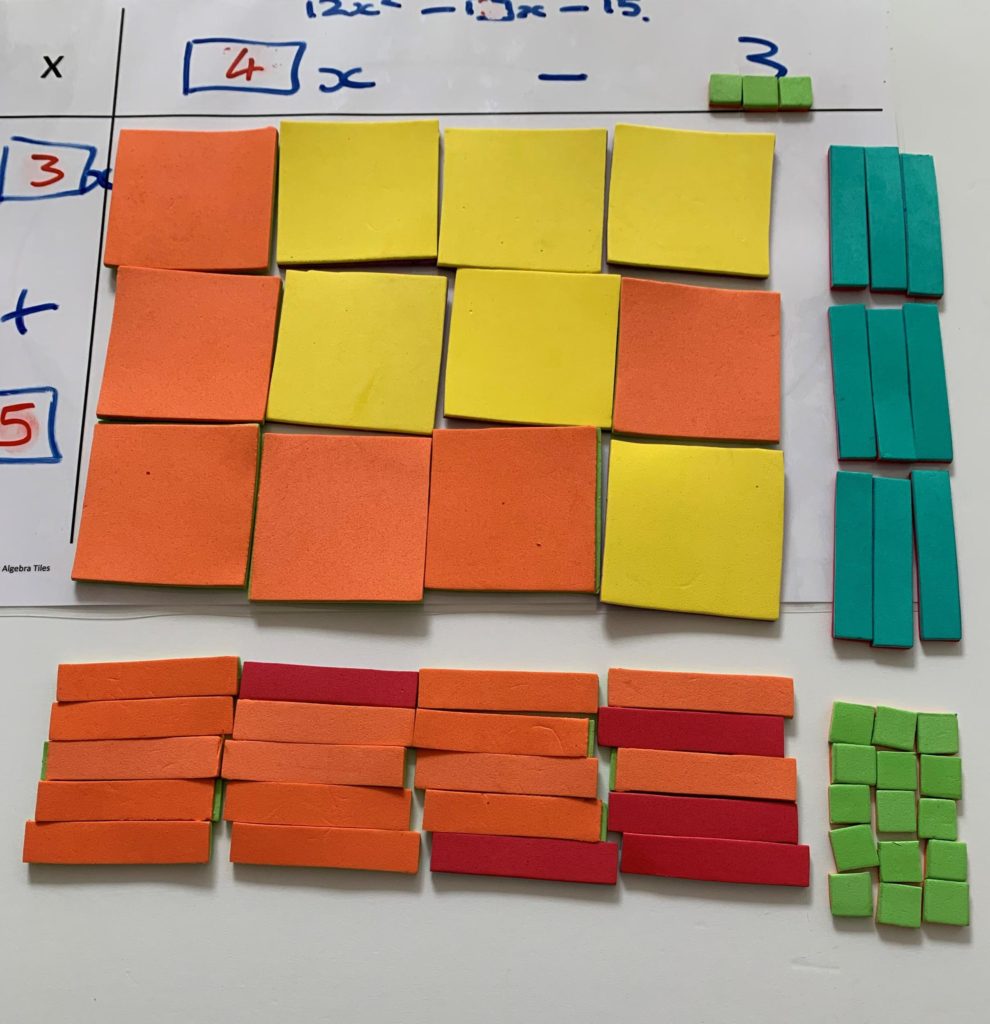
In Part 4 of this series, I will explore multiplying linear expressions and factorising quadratic expressions.

Resources

There is a Padlet to accompany this blog series with links to research, virtual manipulatives and other resources.

Algebra Tiles Part 1 – The wonderful manipulative you have never used?!

In this blog, the first of a series, I will show you Algebra Tiles – how to make them and how to introduce them to your students.

This is the first part of a series of blogs on Algebra Tiles. In Part 1 of this blog series, I will be focussing on introducing Algebra Tiles to your students, making your own Algebra Tiles, and using Algebra Tiles to model the four operations with integers.

Although not part of this blog readers should be aware of the Concrete Representation Abstract Model (CRA). In this model, it is suggested that students move through a series of stages when learning a new concept. Students first experience a concept using concrete objects or manipulatives, they then draw diagrams or representations of the concepts and finally move towards the use of abstract symbols. I will be referencing this model throughout this blog series. For more information on this see the Padlet I have made to accompany this blog series.

What are Algebra Tiles?

In this video clip I introduce the three tiles and what they represent.

Why make your own Algebra Tiles?

There are many commercially available Algebra Tiles, but I like to make them with the students. This is for a number of reasons:

  • The students will then feel that they “own” their tiles.
  • The process of measuring and cutting can tell you a lot about your students’ skills (or lack thereof)
  • The students can pick their colours – this is especially important for students with visual impairments

Here is the template I used for making my tiles and here is the template for the baseboard that I use in the videos.

To make the tiles:

  • Stick two A4 sheets of foam together, this is easiest if one of the sheets has a sticky back.
  • Then rule the sheet according to the template or use the measurements below:
    • unit squares were 1.5cm x 1.5 cm
    • variable rectangles were 1.5cm x 7cm
    • variable squared squares were 7cm x 7cm
  • Cut the shapes using a craft knife as scissors will pull the foam.
  • Keep the tiles in a resealable bag

You might also want to give the students a laminated A3 sheet to work on, so they can annotate and write notes as they use the tiles.

Using the unit tile to model the four operations

In this video clip, I show how the unit tile can be used to model integer addition and the meaning of a zero-sum pair. This concept is key to using Algebra Tiles.

The following clips demonstrate how Algebra Tiles can be used to model the other operations, subtraction, multiplication and division and directed numbers.

Subtraction of directed integers

Another example of subtraction with directed integers

Using the array model for multiplication

Using the array model and Algebra Tiles for multiplication of directed integers

Using the array model and Algebra Tiles to model division

Points to think about as you watch the video clips:

Using manipulatives in older year levels

It is rare to see manipulatives being used in a high school classroom. It is even rare to see them much beyond Year 3! The impression students have is that using manipulatives is infantile and only for those that are struggling. This is not the case and many (all?) students would benefit from using them, even if only for a short period.

I like to give the students time to familiarise themselves with the manipulative before I explain how we will be using them. I will ask the students to think about how they think the manipulative could be used, what mathematics it might be used with.

I might say to teachers that I “allow the students time to ‘play’ with the manipulative”, but I would be careful with the use of the term ‘play’ with students, as students should not view manipulatives as toys, as this would only reinforce the notion that they are not a serious tool for the exploration of mathematical concepts.

The language one uses

When using the tiles, be aware of the language you use. It is easy to use the same term for multiple concepts.

For instance, the word ‘minus’. Does this mean the operation subtraction or that the integer is a negative? How would you read the following?

Would you say, “plus 2, minus, minus 5”? This can be very confusing for students. By being careful to use the terms positive and negative to indicate the direction of the integer only, and not plus and minus or similar, can help to prevent this confusion. For this example, it would be better to say, “positive two, subtract, negative two”.

Giving the positive integer a direction is important. All integers have a direction. As mathematicians tend to be lazy, we drop the term positive as most numbers we deal with are positive. Students need to understand this point.

Give students plenty of time to use the manipulative

Give the students plenty of time to use the tiles. There will be students that ‘get’ the concepts very quickly and will feel that the tiles are not necessary. I would encourage the students to use the tiles a few times at least. Ask the students to record their thinking by taking photos or drawing pictures/diagrams of what they are doing (the R in the CRA model).

Remember the CRA model does not describe a linear process. Students should feel comfortable in picking up and using the manipulative anytime they feel that would be useful. The manipulatives should, therefore, be readily available and accessible.

Comments

Please use the comment section to let me know if you found this introduction to Algebra Tiles useful and, if you used them with your students, how that went.

In Part 2 of this series, I will show how Algebra Tiles can be used to build algebraic expressions, used to model the addition and subtraction of algebraic expressions, and used to model substitution into algebraic expressions.

Algebra Tiles and an Open Middle Problem

I am putting together a series of blog posts demonstrating how to use Algebra Tiles for the new year. As algebra tiles are on my mind, when I saw this Open Middle problem posed in a tweet from Robert Kaplinsky I decided to give it a go using Algebra Tiles.

Algebra Tiles are a great manipulative to use when you introduce algebra to students. They allow the students to explore concepts such as adding and subtracting expressions, factorisation and substitution. There are three different tiles representing the constant, the variable and the variable squared. Each tile is in two colours representing positive and negative values.

The first step was to model what I knew from the given problem. I used a laminated sheet to place the tiles on and wrote what I knew on it.

An Algebra Tile model of the given problem

I arranged the twelve x2-tiles in a rectangle and this gave me my starting point in finding a solution. The arrangement of these tiles was just a random choice.

I noticed that two of the given numbers in the problem limited my choice of the constant in the second factor pair. The -3 in the top factor pair and the -15 in the final expression, restricted my choice of value in the second-factor pair. It had to be +5.

I had 15 negative block that had to be -3 x something – so the something had to +5

I then filled in all the other tiles:

All the tiles laid out in a rectangle

A basic feature of Algebra Tiles is Zero-Sum Pairs. When you have two tiles of the same size and shape, but different colour, they form a zero-sum pair and can be removed. (They cancel each other out)

I formed all the zero-sum pairs of the x-tiles:

The zero-sum pairs

There were three more positive x-tiles than negative x-tiles remaining. as the coefficient of the x-term has to be negative this was not an allowable solution.

My next strategy was to reverse the 3 and the 4 to see if that would leaver me with more negative x-tiles.

The tiles arranged 3 x 4

Again, I could quickly see that there were too many positive x-tiles.

I then started to explore other factors of 12: 6 x 2, 2 x 6

First I arranged the tiles 2 x 6:

Tiles arranged 2 x 6

But there were too many positive x-tiles.

So I switched to 6 x 2:

Tiles arranged 6 x 2

At last! In this arrangement there were more negative x-tiles! I arranged the x-tiles in zero-sum pairs to see how many positive x-tiles were remaining.

Zero-sum pairs from the 6 x 2 arrangement

There were 8 negative x-tiles remaining so my solution was:

(6x + 5) (2x – 3) = 12x2 – 8x – 15

I thought there could be more than one solution to this problem, there normally is in Open Middle problems. So I tried the final factors: 1 x 12 and 12 x 1.

First I tried a 1 x 12 arrangement:

Tiles arranged 1 x 12

This time I ran out of tiles and room! There were too many positive x-tiles so I move on to my last arrangement, 12 x 1:

Tiles arranged 12 x 1

It was easy to see that there were a lot more negative x-tiles in this arrangement. This gave me the solution:

(12x + 5) (x – 3) = 12x2 – 31x – 15

I had found two solutions to the problem.

For many students, the original problem would look inaccessible. Algebra and the notation used is scary and off-putting. By using the Algebra Tiles and building a visual representation of the problem students have a starting point, a route into the problem. Some students may not need to explore all the possibilities with the tiles. Once they have modelled a couple of possibilities many students will start to make predictions and be able to relate what they are seeing to the notation that is used.

Show the students how the arrangement of the tiles relates to the terms they get when they multiply out the brackets – connecting FOIL and the Area Model.

A nice extension of this problem would be to ask students to explore the possibilities if they were not restricted to the -3.

This and many other insights and suggestions for using Algebra Tiles to deepen students’ understanding of algebra concepts will be explored in my series next year.

Below is a link to the Algebra Tiles Learning Sequence I wrote for AMSI. The blog series will be based around this sequence.

https://calculate.org.au/2019/03/27/algebratiles/